Introduction
Have you ever heard of calcium silicate board? I hadn’t either, until I decided to use it for a construction project. It’s a versatile material, used in various applications, from wall construction to ceiling installation. In fact, I used the JMING-800 Fire Board, a specific type of calcium silicate board known for its excellent fire resistance and moisture-proof properties. Today, I’m going to share my experience on how to install it. This board material is not only cost-effective but also ideal for factory building and residential building due to its durability and resistance to various environmental factors. Let’s dive into the details.
Materials Needed
Before we dive into the calcium silicate board installation, let’s talk about the materials you’ll need. For wooden bases, you’ll need wood screws or nails.

If you’re working with a steel substrate, you’ll need self-tapping screws or machine screws. Obviously, you’ll additionally need the calcium silicate board itself.

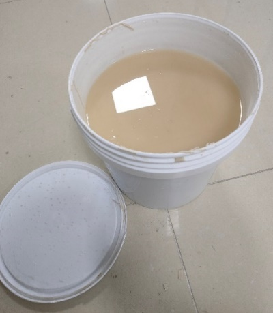
In many cases, you might also need adhesives, such as JMAD-1808, a modified, ceramic-based adhesive understood for its high-temperature bond. The use of adhesives relies on the specific process and design needs of your project.
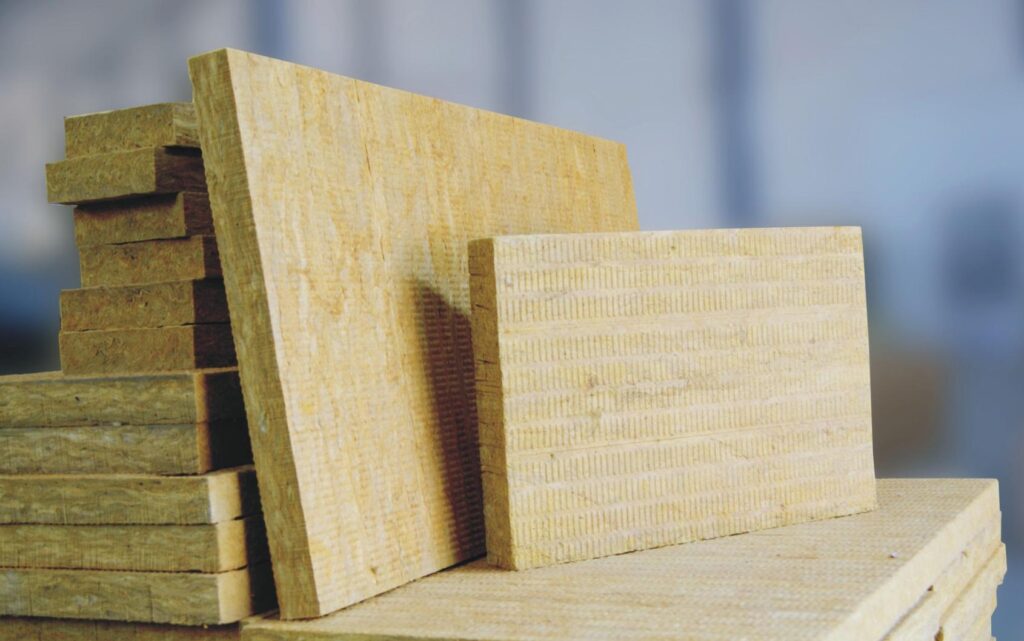
For projects needing sound insulation and thermal insulation, materials like glass cotton and rock cotton are usually made use of. These materials can be included as an insulation layer to boost the efficiency of your fire proof system.
Remember, the calcium silicate board is fire-resistant, making it a cost-effective option for your building requires. Depending on your project, you might require other materials as well. Constantly consider the specific requirements of your project to make sure a secure and effective installation.
Pre-Installation Steps
Before you begin the install of the calcium silicate board, see to it your base material is ready. Whether it’s a wood base or a steel base, the board material can be fastened directly to it. The distance between the fasteners and the substrate will depend on the component used and the plate thickness, so make sure you have the dimensions required.
Recommended fastening interval
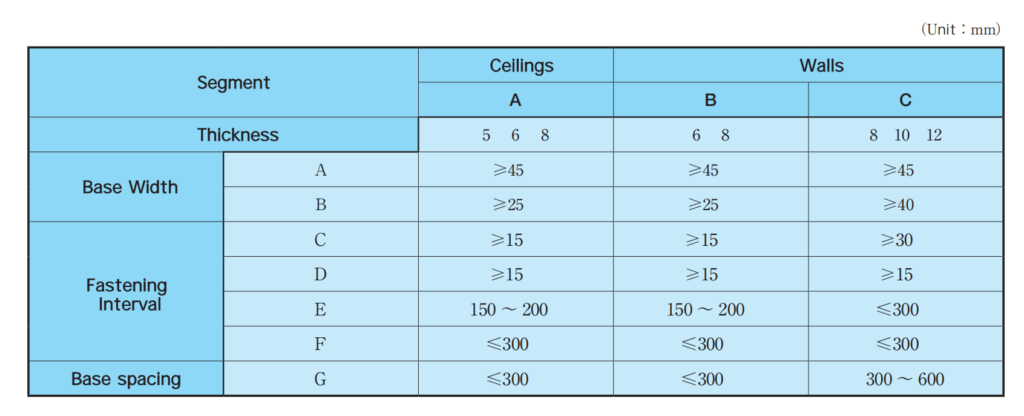
When screwing the corners, focus on the spacing and position of the fasteners. It’s important to make sure that the board is fixed at multipoint simultaneously to ensure stability. If you’re attaching something to the calcium silicate board, see to it it’s attached to the base material.
For ceiling construction, the substrate should be perpendicular to the fiber direction of the calcium silicate board. This is an essential detail to keep in mind when you install calcium silicate board on the ceiling.

Handling
(1) Working Environment:
Prior to beginning the installation process, guarantee that your working environment is equipped with a dust collector. When cutting or shaping the JMING-800 boards, it can generate dust, which you need to manage effectively to avoid generating too much dust and maintain a clean and safe workspace.
(2) Personal Protection:
Safety should always be your priority when working with any type of building and construction material, including the JMING-800. Prior to starting, make sure you have the following personal protective equipment:
- Masks: To protect you from inhaling any dust particles.
- Face Shields and Goggles: To protect your face and eyes from any flying debris during cutting or drilling.
- Safety Shoes: To protect your feet from any falling objects.
- Work Clothes: To shield your body from dust and debris.
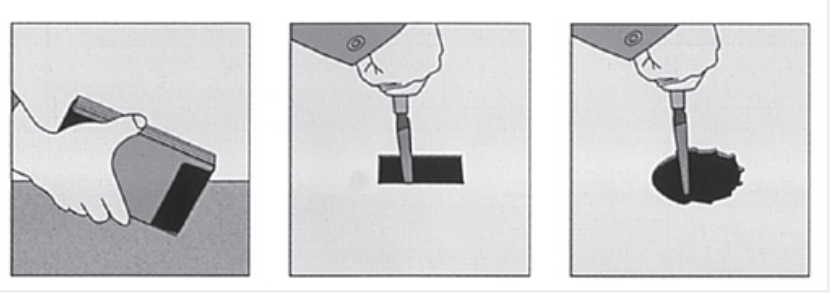
(3) Cutting:
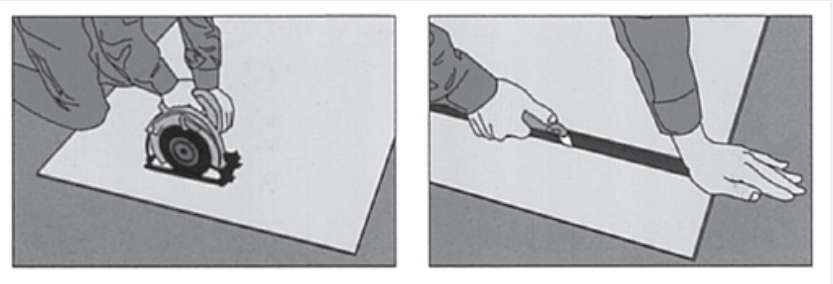
For cutting the board, I used a slate saw and an electric motor with a dust collector. When performing harsh cutting, I made a few cuts with a cutter on the front and rear of the board, then bent it. This procedure makes sure that the board face is not damaged.
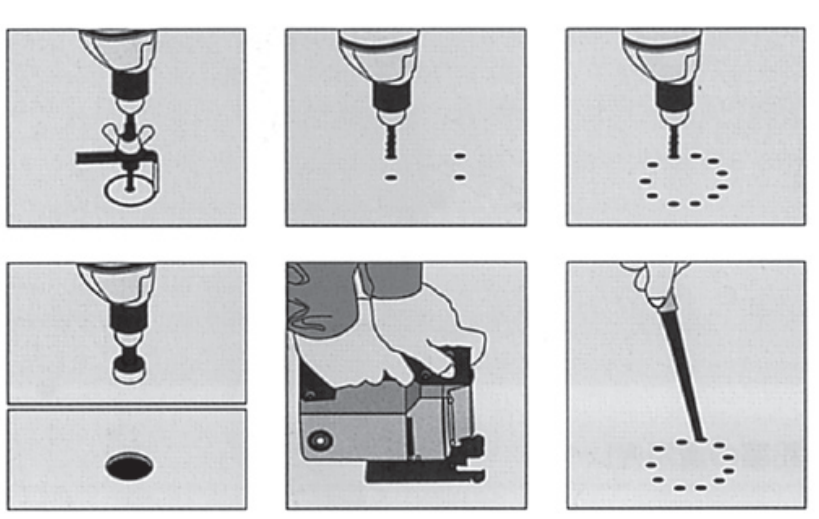
(4) Drilling:
For drilling small openings, I used a hand drill or an electrical drill. After using a hole saw or drilling a small opening, I cut out the rest with a jigsaw. Bear in mind, when drilling, it’s important to fix the board securely to prevent any movement.
(5) Finishing:
After cutting and drilling, I finished the sides with a file and sandpaper. This action is very important to smooth out any rough edges and guarantee a clean finish on all sides of the board.
Wall Construction
Before starting the wall construction, specifically for a partition wall, I inspected the substrate for looseness and unevenness. I also checked the condition of foundation reinforcement around openings such as windows and doorways. I took into account the wall height to ensure stability. Then, I marked accurately based on the standard marking according to the construction drawing. I tried to avoid loss as much as possible in allocation. When installing on an opening such as a door, I didn’t cut the calcium silicate board from one end to the other.
For cutting the calcium silicate board, I used a board cutter, jigsaw, dedicated saw, and a portable electric saw with a dust collector. The general mounting method and fastening intervals of calcium silicate boards are shown below. Remember, when screwing the board to the substrate, it’s important to fasten it securely on one side to ensure stability.

Ceiling Construction
Just like with the wall construction, I inspected the substrate before starting the ceiling construction. I marked accurately based on the standard marking according to the construction drawing. For cutting the calcium silicate board, I used the same tools as before. The general mounting method and fastening intervals of calcium silicate plates are shown as follow. I started from the center of the ceiling, and gradually raised it toward the four circumferences.

Finishing
Finally, it was time for finishing. Before painting, I applied a sealer after surface preparation. For general interior use, I used interior synthetic resin emulsion paint, acrylic resin paint, or urethane resin paint. For kitchens, dressing rooms, and other water-sensitive areas, I used exterior synthetic resin emulsion paints, acrylic resin paints, urethane resin paints, etc. I didn’t use oil-based paints, phthalate resin paints, or lacquer paints on calcium silicate plates because of their alkaline nature. I used non-formaldehyde paints.
For a cloth finish, I applied a sealer after surface preparation, just like with the painted finish. I used an adhesive suitable for the finishing material (wallpaper, cloth, etc.) and used a non-formaldehyde adhesive.
For a tile finish, I applied a sealer after surface preparation. As a general rule, I used two pieces of base board for the base board to reduce the movement that may occur at the joints of the base board during earthquakes. The height of the tile should be less than 5 m. I used mechanical fall prevention if necessary.
Conclusion
And there you have it! That’s how I installed calcium silicate board. It might seem like a lot of steps, but with a little patience and the right tools, it’s a manageable task. I hope this guide helps you with your own installation project. If you have any questions or need more information about calcium silicate boards, don’t hesitate to reach out to the experts at JMING BOARD. They’re always ready to help. Good luck with your project!